A spotless bathroom does not require harsh chemicals or hours of scrubbing. It starts with knowing what your tub and tile are made of, where grime collects, and which cleaner is safe for each surface. Soap scum often clouds the lower walls. Grout darkens around corners. A faucet can look dull even after the basin is clean.
Tile consultant Donato Pompo is a relevant expert for understanding tile and stone care. However, no source article or verified quotation was provided, so I won’t invent a sentence and attribute it to him. That distinction matters. Cleaning advice should be useful, but it should also be trustworthy.
This guide will walk through a practical routine for cleaning tub and tile, from clearing bottles off the ledge to rinsing away cleaner before it dries. You’ll learn how to loosen soap film with a non-abrasive method, use a soft brush on grout, and avoid tools that may scratch delicate finishes. Check product labels, test cleaners in an inconspicuous spot, and follow the tub or tile manufacturer’s care instructions. Small choices matter.
Especially on older surfaces.
A clean bathroom should feel fresh, not smell sharply of chemicals. Still, not every stain disappears on the first pass, and aggressive scrubbing can cause damage. That is easy to forget when a dull patch catches the light. The steps ahead aim for a cleaner room while treating the surfaces with care.
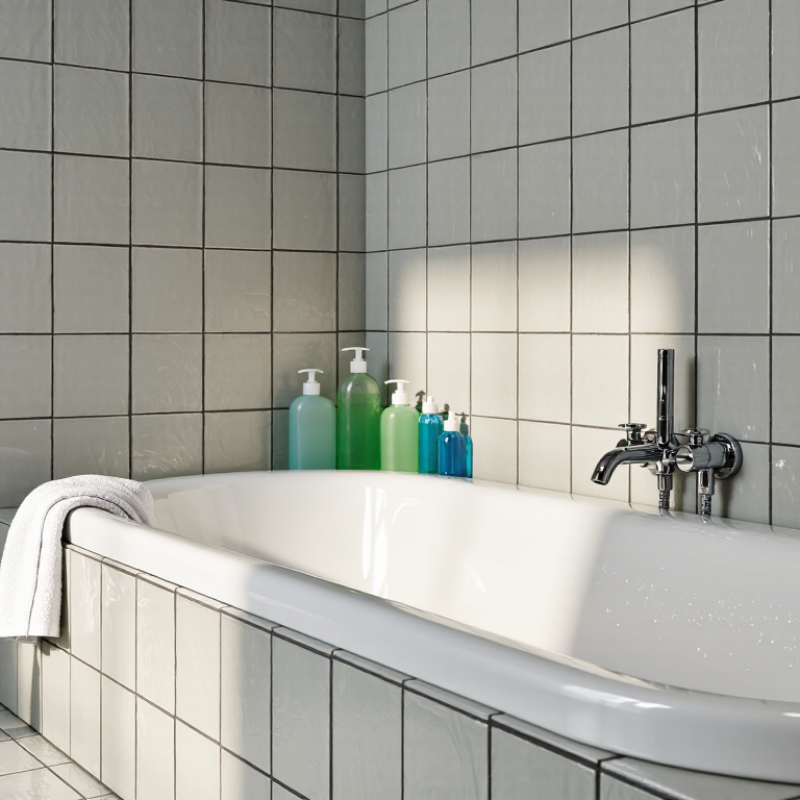
A spotless bathroom starts with knowing what the tub and tile are made of. Porcelain enamel usually tolerates more scrubbing than acrylic, but harsh scouring pads can still dull its finish. Acrylic tubs are lighter and easier to scratch, so use a soft cloth and a cleaner labeled safe for acrylic. Natural stone, such as marble, needs special care. Acidic cleaners, including vinegar, may etch its surface. Grout can also vary, so check whether it is sealed before applying strong products. Know the surface first.
Choose a cleaner for the most delicate material in the area. If stone tile meets a porcelain tub, avoid letting an acidic product run across both. Apply cleaner to a small, hidden spot and follow its label directions. Wait the stated time, then rinse well; leftover cleaner can leave a cloudy film. A dull patch may be damage, not dirt. It is tempting to scrub harder when a stain stays put, but that can make the mark permanent. I would rather repeat a gentle cleaning than risk the finish.
Tips: Use separate cloths for the tub and grout. Ventilate the room, wear gloves if the label recommends them, and never mix cleaning products. If you cannot identify a surface, pause and check its care instructions before cleaning.
Before touching the tub, clear bottles, bath mats, and loose items from the room. Set out disposable or reusable gloves, a nonabrasive sponge, a grout brush, microfiber cloths, a bucket, and a small bag for debris. Keep a separate cloth for fixtures; grit caught in a sponge can leave fine scratches. Keep it simple. Check cleaner labels and use products only as directed. Never mix cleaning chemicals, especially bleach with ammonia or acidic cleaners.
Open a window or run the exhaust fan while you work. The U.S. Environmental Protection Agency’s A Brief Guide to Mold, Moisture and Your Home recommends keeping indoor relative humidity below 60%, ideally between 30% and 50%. That guidance concerns moisture control, not a guaranteed cleaning result, but it explains why ventilation matters in a damp bathroom. Remove visible dust and hair before wet cleaning; otherwise, they can smear across tile and collect in grout lines. Small detail.
Check the tub and tile for chipped finishes, loose grout, or cracked caulk before scrubbing. A stiff brush may worsen a damaged area, so use a soft sponge there and reassess rather than pressing harder. Place supplies within reach, but keep electrical items away from wet surfaces. I can overlook the floor while preparing; a towel near the tub helps catch drips, though it is easy to forget.
Before cleaning a tub or tile, remove anything that can trap grit. Lift bottles, bath mats, and soap dishes, then collect hair and loose debris with a dry cloth or soft brush. Sweep the tub’s corners and the edges where tile meets the floor. Small particles can scratch some finishes when rubbed around with a wet sponge. Check the grout lines, too. They often hold crumbs and dust that are easy to miss.
Tips: Use a soft-bristled brush for corners and grout. Blot spills rather than rubbing them deeper into porous grout. For dried soap, toothpaste, or light surface stains, dampen the spot with warm water and let it sit for a few minutes. If needed, apply a cleaner suitable for the surface, following its label. Test it in a hidden area first, and never mix cleaning products.
Give stubborn stains time to loosen before scrubbing. A short soak is usually gentler than pressing hard with an abrasive pad. I sometimes rush this step and end up repeating the work around the faucet. Not ideal. Rinse treated areas well, and use a clean cloth to lift away loosened residue before cleaning the whole surface. If a stain remains, check whether the material needs a different approach rather than scrubbing harder.
| Step | Area or Soil | What to Do | Suggested Tools | Typical Time |
|---|---|---|---|---|
| 1. Clear the surfaces | Tub, tile, and shower floor | Remove toiletries, bath mats, and other items so the surfaces are accessible. | Storage basket or tray | 2–3 minutes |
| 2. Remove loose debris | Dry tub and tile surfaces | Pick up hair and visible debris, then wipe or sweep away loose dust before adding cleaner. | Dry microfiber cloth, soft hand brush, or dustpan | 2–4 minutes |
| 3. Rinse away surface residue | Tub basin and tiled walls | Use warm water to loosen light soap residue and prepare the surfaces for cleaning. | Handheld showerhead or clean cup | 1–2 minutes |
| 4. Pre-treat soap scum | Areas with a cloudy or greasy film | Apply a bathroom cleaner suitable for the surface. Follow its label directions and allow the stated dwell time; do not let the product dry. | Surface-compatible bathroom cleaner, soft sponge | Follow product label |
| 5. Pre-treat hard-water marks | White or chalky deposits around faucets and on tile | Use a cleaner labeled for mineral deposits and approved for the surface. Test a small, inconspicuous area first. | Approved descaling cleaner, soft cloth | Follow product label |
| 6. Pre-treat stained grout | Discolored grout lines | Apply a grout-safe cleaner as directed. Avoid abrasive tools that can wear or scratch grout. | Grout-safe cleaner, soft-bristled brush | Follow product label |
| 7. Scrub and rinse | Tub, tile, and grout | Gently scrub treated areas, then rinse thoroughly with clean water. Repeat only as directed if residue remains. | Non-scratch sponge or soft brush, water | 5–10 minutes |
| 8. Dry and check | Cleaned surfaces and fixtures | Wipe dry to reduce water spots, then check for any remaining residue or stains. | Clean microfiber cloth | 2–4 minutes |
Safety: Ventilate the bathroom, wear gloves when indicated on the product label, and never mix cleaning products—especially bleach with ammonia or acids. Check cleaner labels for compatibility with the tub, tile, and grout.
Remove bottles, bath toys, and loose hair so you can reach the tub’s edges. Run warm water over the surfaces, then apply a bathroom cleaner suitable for your tub and tile. Check the label, and test it on a small, hidden spot if you are unsure about the finish. Let it sit only as directed. A few minutes can loosen soap film; leaving cleaner to dry may leave another mess.
Use a non-scratch sponge on the tub, working from the upper sides toward the drain. For textured tile, a soft brush can lift grime from shallow grooves. Rinse the sponge often, especially where gray residue gathers. Grout needs gentler, focused strokes: use a small soft brush and move along each line rather than scrubbing wildly across it. Don’t press too hard. I used to rush the corners, then noticed dull soap buildup there the next morning.
Rinse each section with clean water and check it in good light. If a stain remains, repeat the cleaner’s directions instead of reaching for a harsher product. Never combine cleaning products; ventilate the room and wear gloves if the label recommends them. Drying tile and grout with a towel can reduce water spots, though I sometimes miss the narrow strip behind the faucet. That part takes patience.
After scrubbing, rinse the tub and tile with clean, lukewarm water. Work from higher surfaces downward, so loosened soap and cleaner do not settle on areas already rinsed. Pay attention to grout lines, faucet bases, and the narrow seam where the tub meets the wall. Leftover cleaner can leave a dull film. Rinse again if the surface feels slick. Then dry the tile, fixtures, and tub rim with a clean microfiber cloth. Dry the corners too. The U.S. Environmental Protection Agency advises drying water-damaged areas within 24–48 hours to help limit mold growth. That guidance concerns water damage, not a routine cleaning deadline, but it shows why lingering moisture deserves attention.
To slow future buildup, run the bathroom fan during bathing and afterward, and leave the shower curtain or door open to improve airflow. Wipe down wet surfaces after use, especially where water collects around fixtures. Hard water can leave mineral deposits as it evaporates. The U.S. Geological Survey classifies water above 120 milligrams per liter of calcium carbonate as hard, and above 180 as very hard. If deposits return quickly, check whether your local water utility publishes hardness data before changing your cleaning routine. Drying is easy to rush. Even careful wiping cannot fix a dripping faucet or a failing seal, so inspect those spots when residue keeps returning.